Welcome to Eclipse Manager, a versatile project tracker that provides powerful ways to organise your workflow, keeping track of progress, invoicing and time. It is an efficient way to evaluate your performance whilst measuring project success.
At a basic level, Eclipse is structured by breaking projects down into tasks. Tasks are actioned to reflect the progress and evolution of a project. They allow the project to be understood at a glance and can be prioritised to keep track of what needs doing next.
What you envisage as a “Project” is completely up to you, it could be to track freelance work, a homework assignment or even a goal you are working towards. The best way to see if Eclipse is right for you is to install it and give it a go. Eclipse Core is free to download and user however extra functionality is available with Eclipse Pro for $1.99 a month.

To install Eclipse, download it on to your Windows 10 device – you can do this by searching for “Eclipse Manager” on the Windows Store. After installing the app launch it from your start menu, you are now ready to begin.
Eclipse will automatically make an account for you using your Microsoft account information this will securely identify you. When you sign in for the first time you need to grant the app permission to proceed. You can revoke these permissions at any time in the privacy page of your Microsoft account. If you do revoke permissions Eclipse will ask you for them again next time you reinstall the app.
Now you are ready to go – let’s begin managing your projects!
In this section we will learn how to create a basic project. Once you have installed the app and launched it, you will be brought to the “Overview” page where you will see a list of all your projects – as you haven’t added any yet it will appear empty. To create a new project, click “Add Project” and the New Project window will appear.
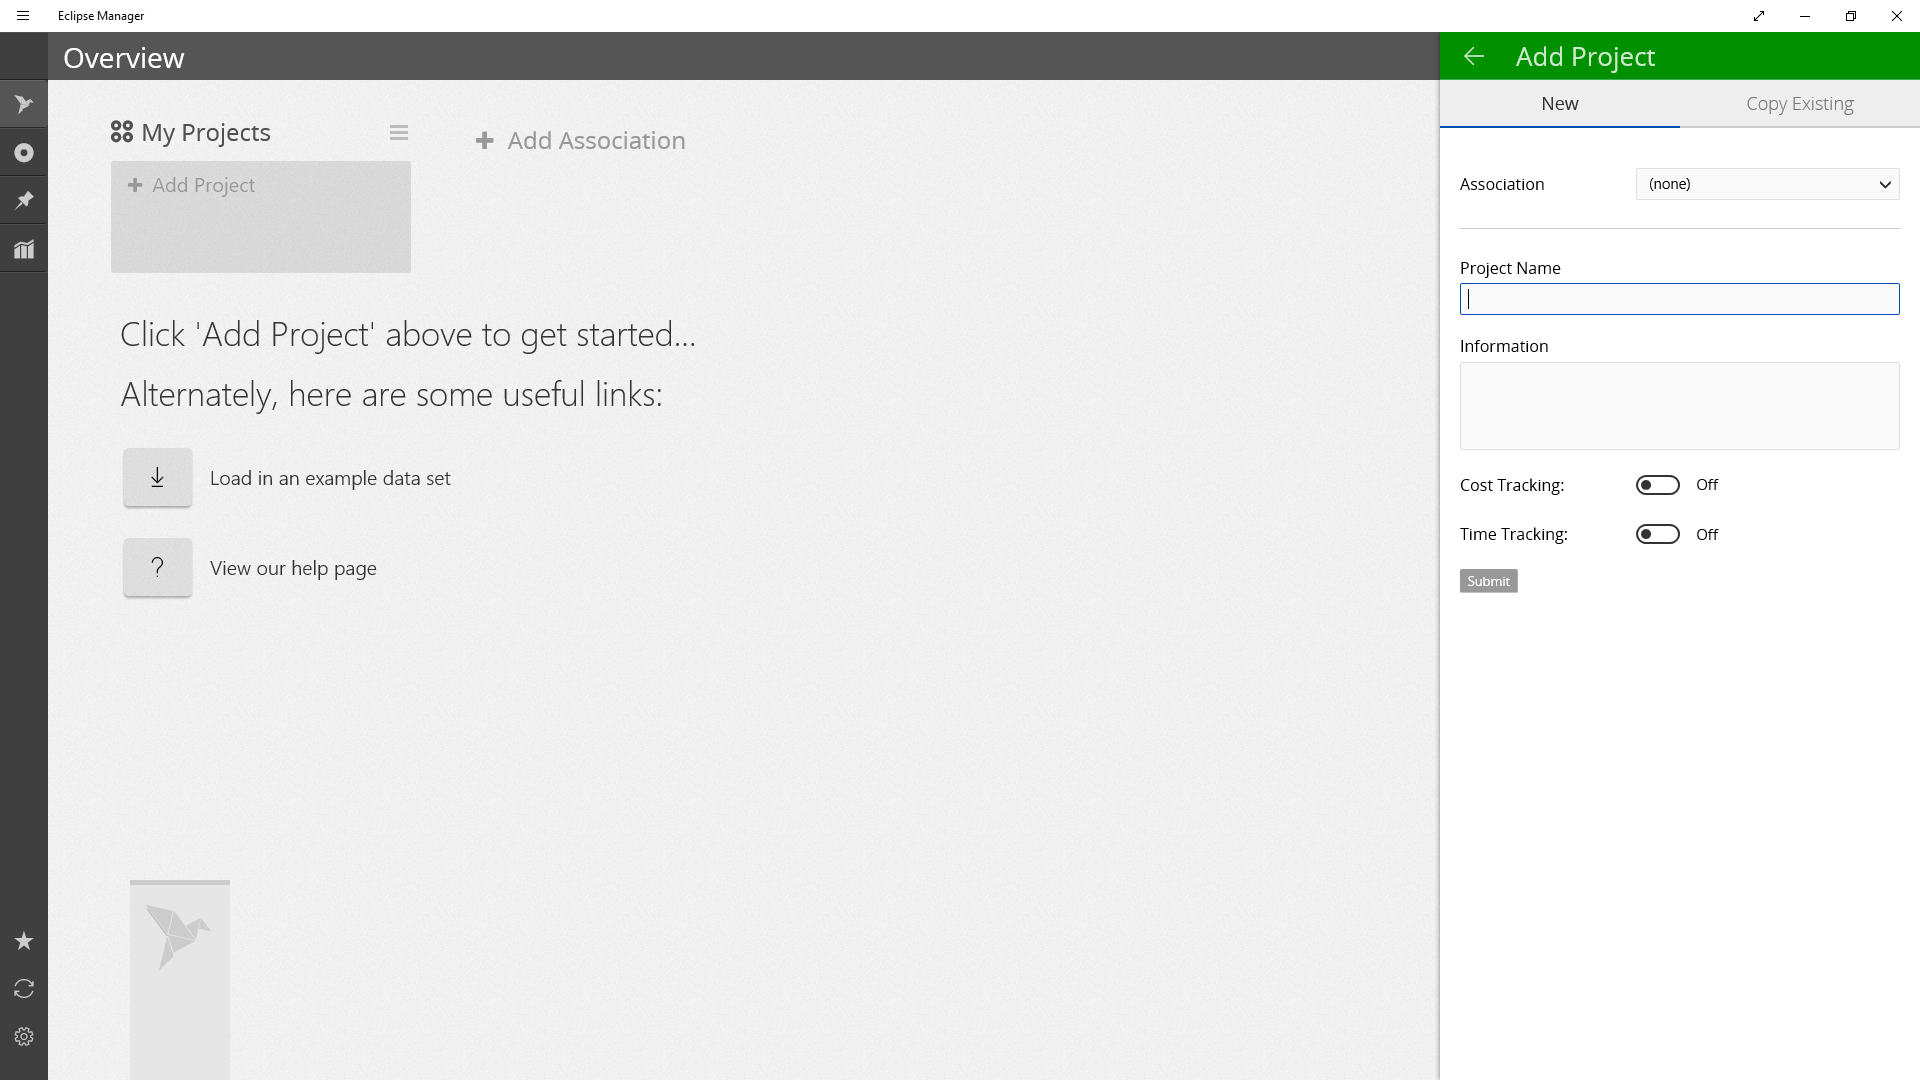
This window is where we define our project. In the name field add “Learn Eclipse” and click “submit” to add. We have left time and cost tracking off for this tutorial – to learn about them visit the “Projects” section of the help page.
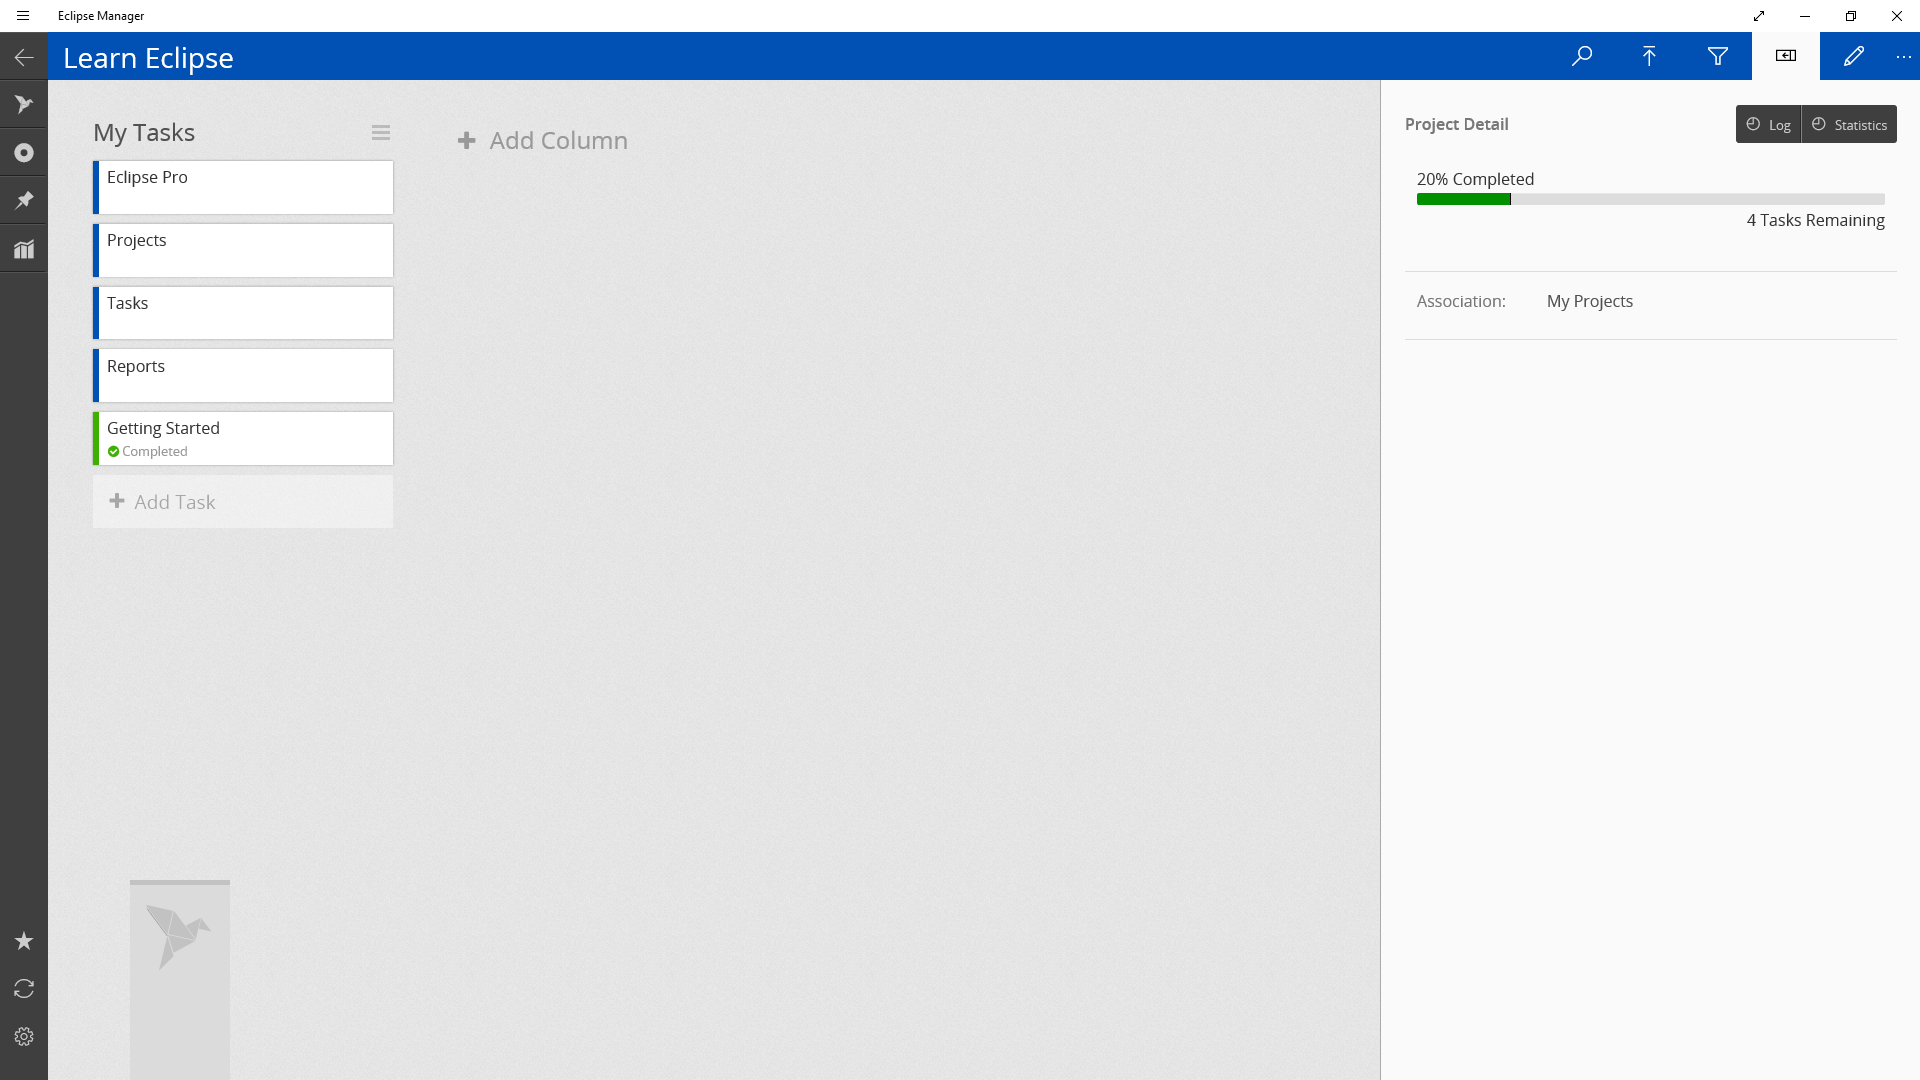
You have now created your first project. Click on it to open it.
This is the project page; this page is where you can view and work on project tasks. Down the right-hand side is a summary of the project and in the centre are its tasks. Click on “Add Task”, call it “Getting Started” and click “submit”. Now add 4 other tasks “Eclipse Pro”, “Projects”, “Tasks”, “Reports”
That’s it! Your project is now setup and you can use it to keep track of your progress through this help section. Click on the “Getting Started” tasks you just made and click “Complete”. Eclipse automatically prioritises your tasks so it drops to the bottom of the list.
Hopefully you are now familiar with the basics of project. The other pages in help go through each section of the app comprehensively for when you are ready to get more out of Eclipse or simply have a question about one of the features.
Use the navigation down the left to navigate to the following pages:
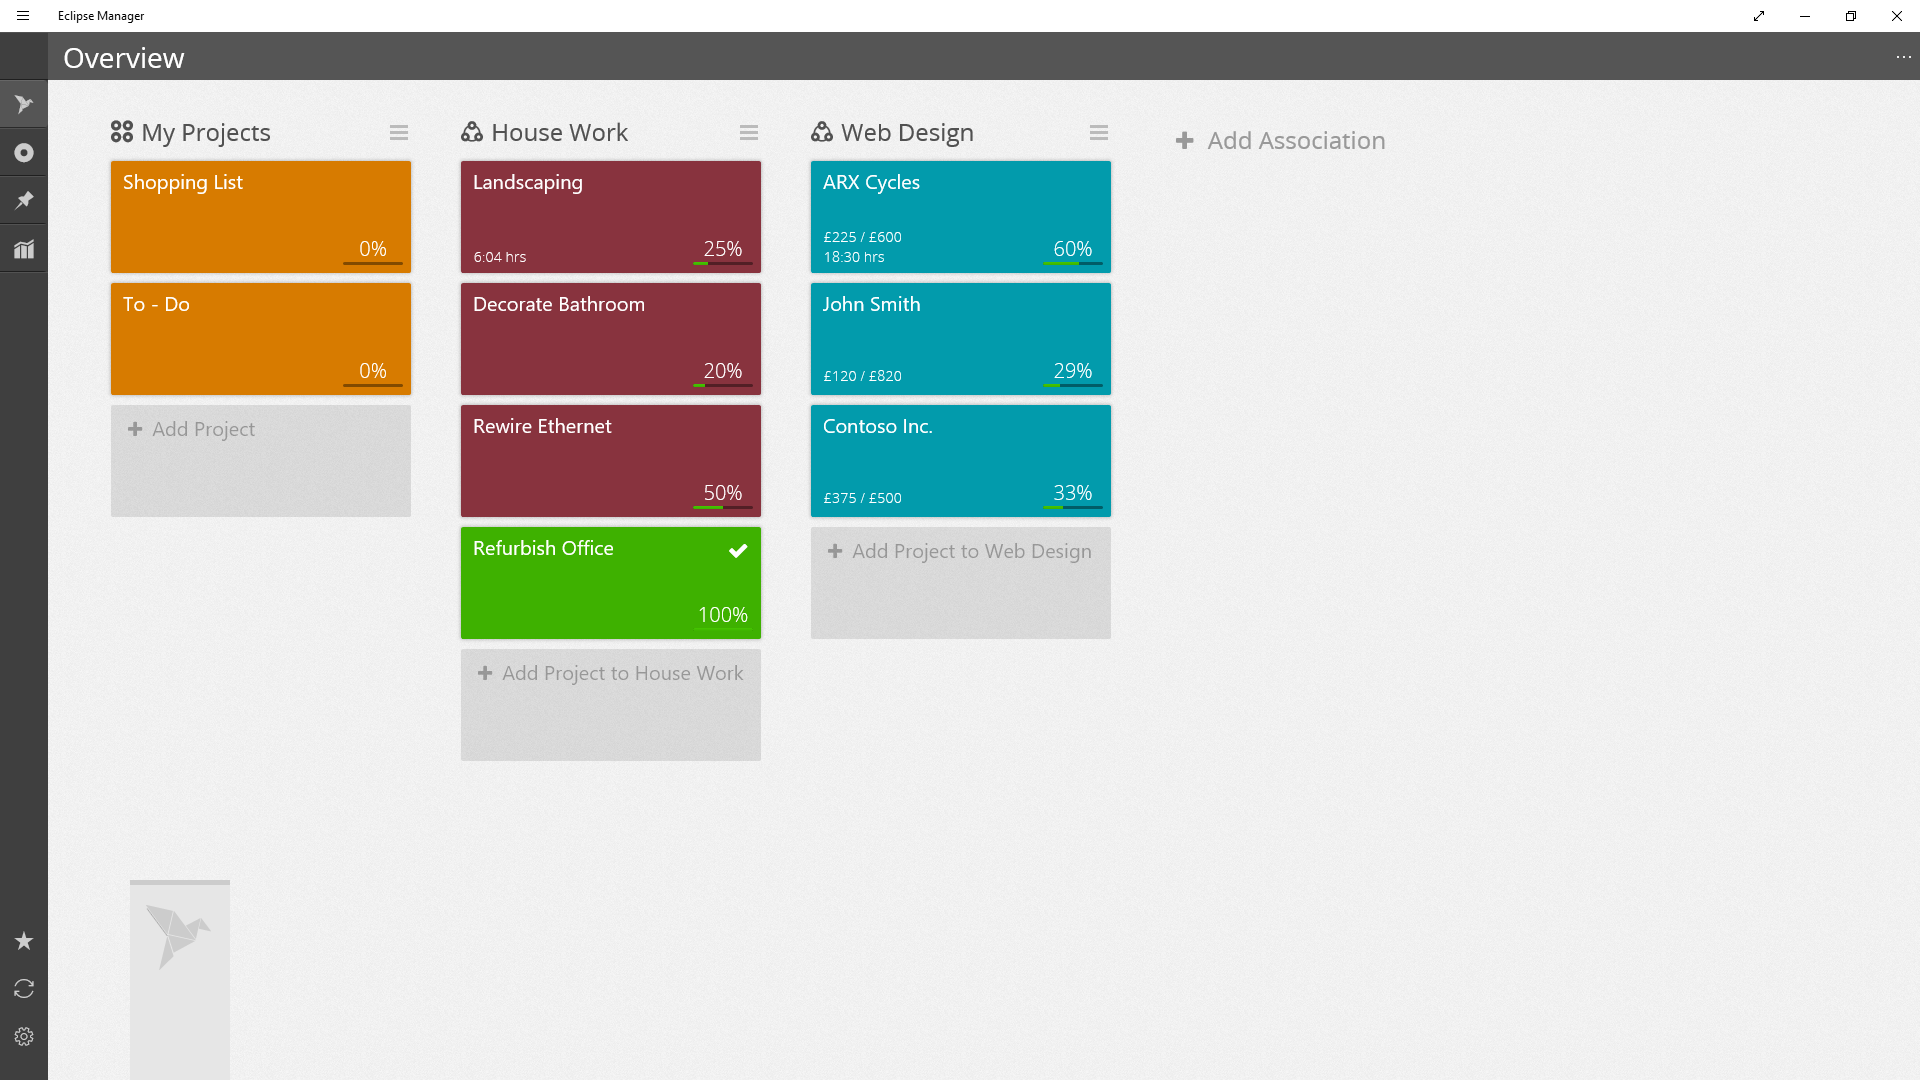
View your Projects grouped into their Associations. Click on a project to open it.
Quickly navigate directly to a Project
View tasks across all your Projects
View your activity
Look at what Eclipse Pro has to offer
Eclipse syncs your changes automatically but you can force a sync here
View Eclipse settings