Projects are the containers for organising tasks. They would usually be a fixed project or assignment which you want to accomplish – but can equally be used for just collecting ideas or making a Christmas list.
The setup of the project is important as that defines what properties are available to tasks, if you want to track time or costs these options must be turned on in the project.
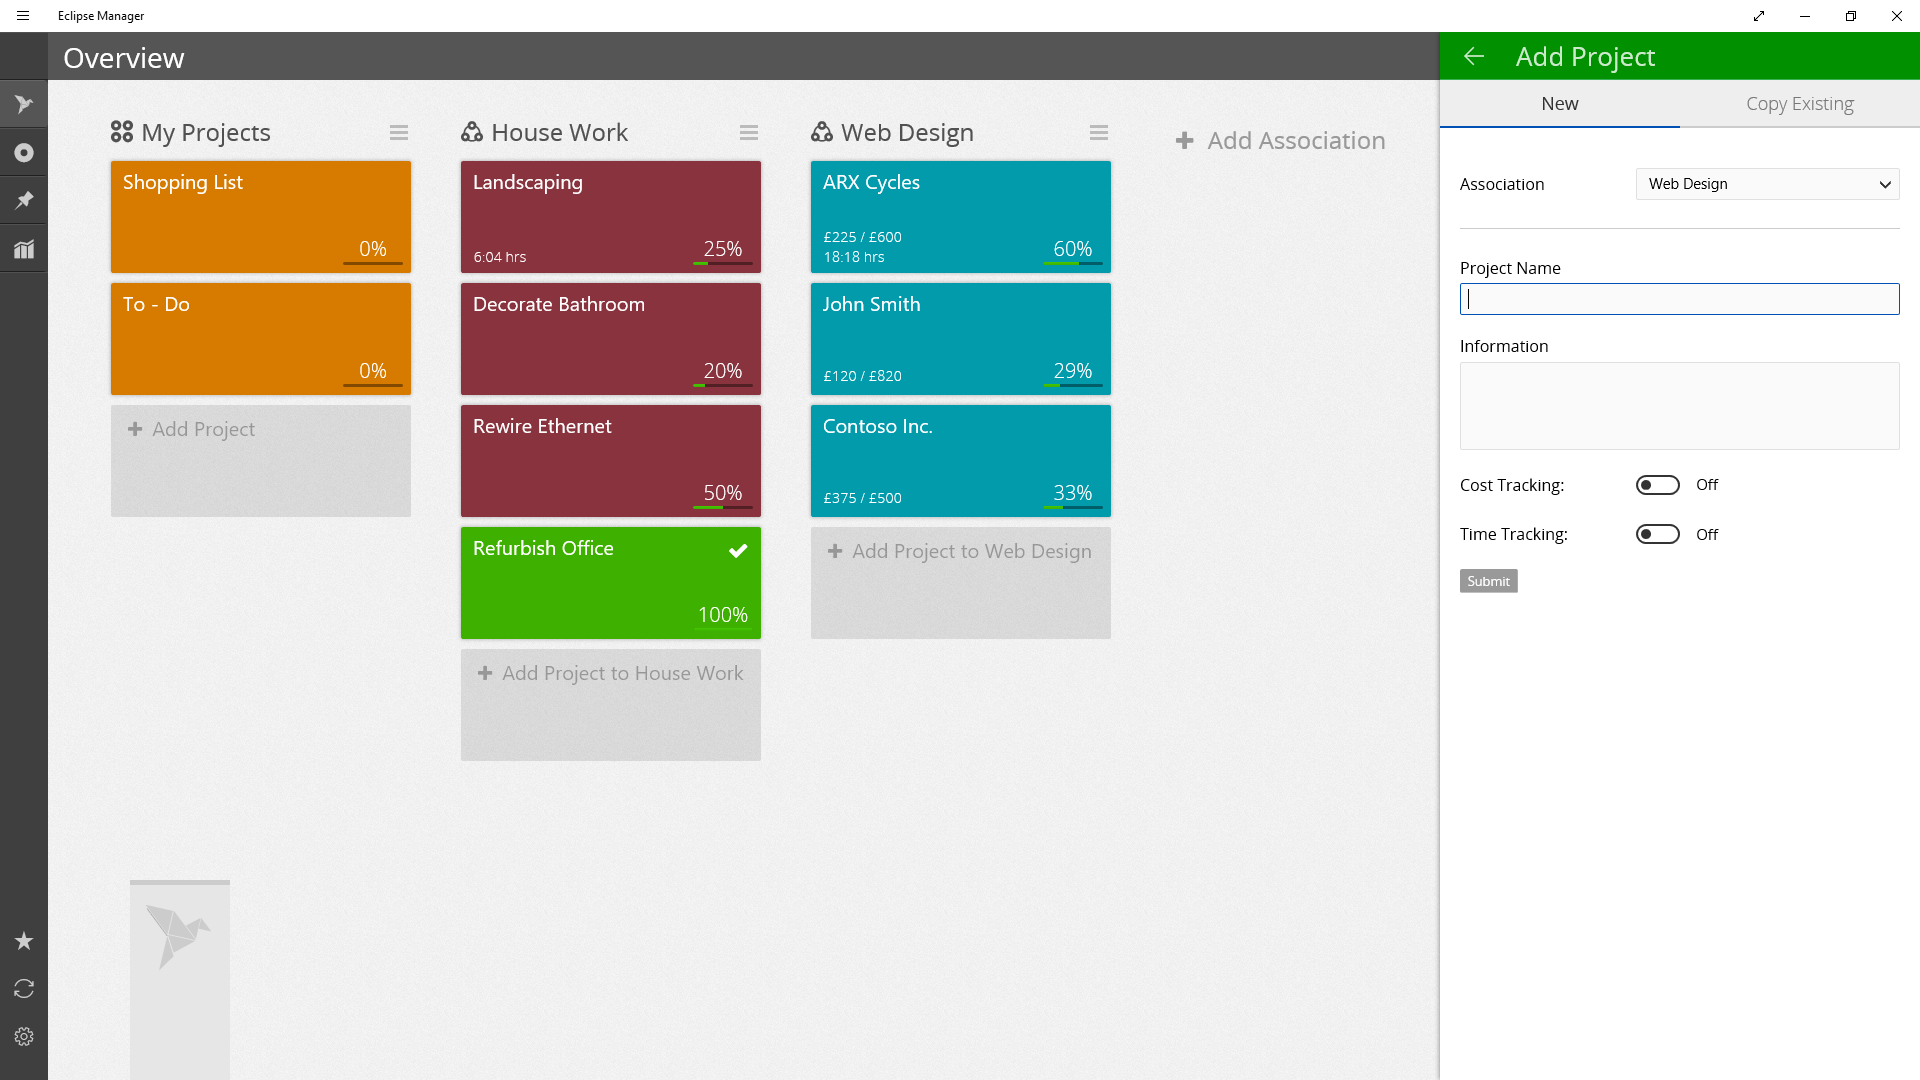
Projects are created on the Overview page. In the Association you want to add your project to, click “Add Project”. This will open the add project window for you to enter your project details, enter your project details and click “submit”. More information on project properties can be found in the next section.
Projects can also be created by using an existing project as a template – great if you have repeat jobs. To copy an existing project, click the “Copy Existing” tab at the top of the add project form and select the project you want to copy in the “Template” field.
Project properties are important as it defines the workspace that your tasks occupy. If you want to track time / costs, then this must be specified in the project or you won’t be able to do it.
This is the “Association” that the project belongs to, associations provide a way to group projects. You can add an association via the “Add Association” button on the far-right side of the overview page or when you are creating a new project. Example associations could include “Work”, “Home” or “Personal”. If you don’t wish to add any specific association your projects will automatically be categorised in the “My Projects” Association.
You will have the option to choose the Association colour when you are creating it, the projects categorised in the association will be the same colour making them easy to identify.
This is the project name.
The Any project description goes here – this appears on the project page.
Cost Tracking allows you to track billing. If you are a pro user you can choose to enable Cost Tracking when you create your project via the on/off slide button. There are three cost tracking options:
|
Incremental |
Each task in the project can have a value assigned to it, when the task is completed the money is marked as received. Thus, the total project value is defined by the sum of all the task vales. |
|
On Completion |
The project is assigned a fixed value which is marked as complete when all the tasks in the project are completed. |
|
Hourly |
Project value is entered as an hourly rate, as projects are timed their value is calculated. |
Time tracking allows you to log how much time you spend on different projects and tasks. You can choose to enable Time Tracking when you create your project via the on/off slide button. You can either manually or automatically track time.
When time tracking is enabled, tasks will display the option to “Start / Stop” timing which you can turn off and on to suit the working schedule of a project. If you do not wish to do this there is also a timing log for each task that can be edited manually
If time tracking is not enabled users will have the option to “Stamp” tasks. This allows the user to track activity on the tasks without it being timed. If a task has been “Stamped” the user can see when they last worked on it and more usefully it will appear in the recently used list of tasks.
When on the Overview page clicking on a project will open that project.
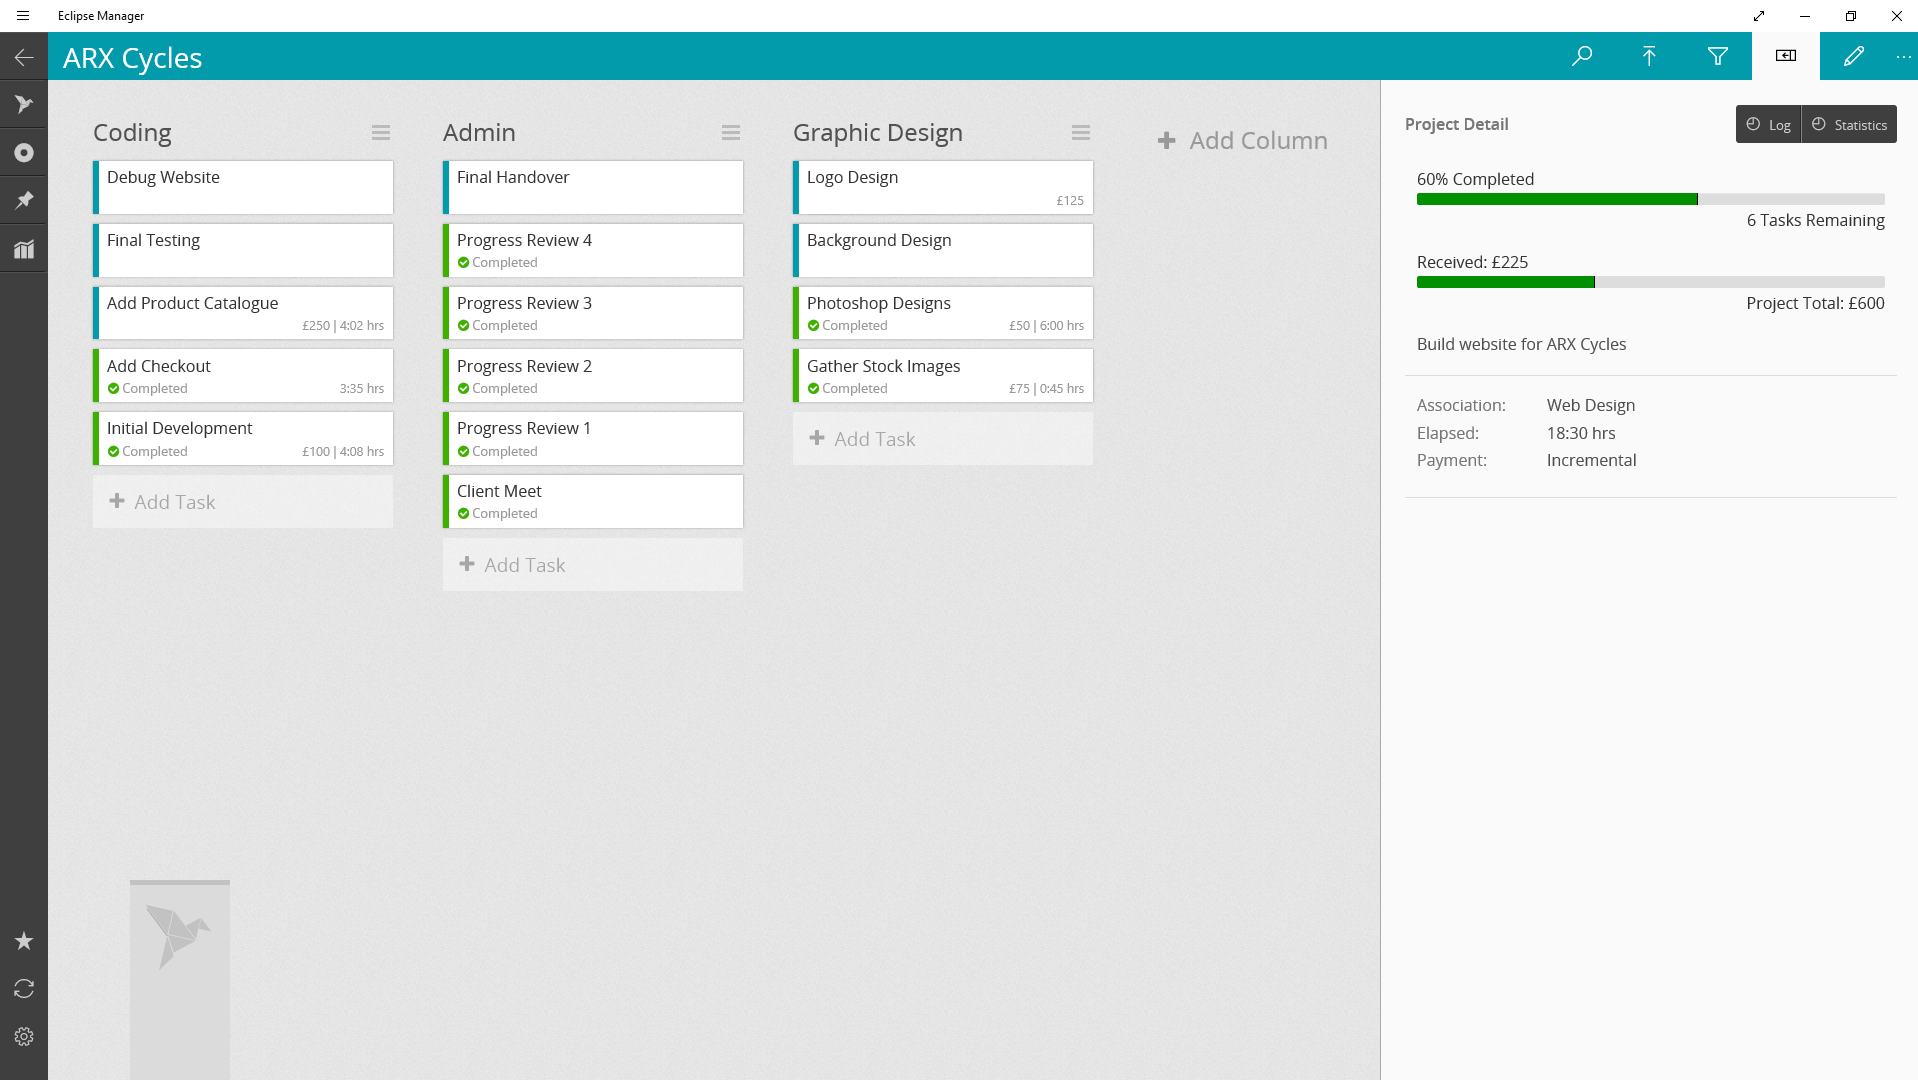
The project body contains the tasks, the components of the project. More information is available on tasks in the following section.
The app bar provides a central control point for the project page. The App bar provides access to different functions of the project page.
|
Search |
Allows you to navigate through project tasks. Just type key words or task names to search. |
|
Export |
Allows project data to be exported into excel. (Eclipse Pro) |
|
Filter |
Allows the user to hide/show completed and ignored tasks. |
|
Toggle Project Pane |
Toggles the Project Pane open / close |
|
Edit |
Allows the user to copy, edit or delete the project. |
The project pane contains the project information and overview. This pane can be toggled on/off by clicking the “Toggle Project Pane” button detailed above. If you hide the Project Pane, it will remember this choice for the project and remain hidden the next time you use the project just click the “Toggle Project Pane” button to turn it back on.
At the top right of the Project Pane there are buttons to access the project insights. Insights offer places to view additional project data in visual forms, they are independent to the Eclipse Pro feature of reports (details of which can be accessed via the Reports section of the help page). Currently the two insights offered are “Statistics” and “Log”.
The statistics page presents your project graphically by progress, time or invoicing.

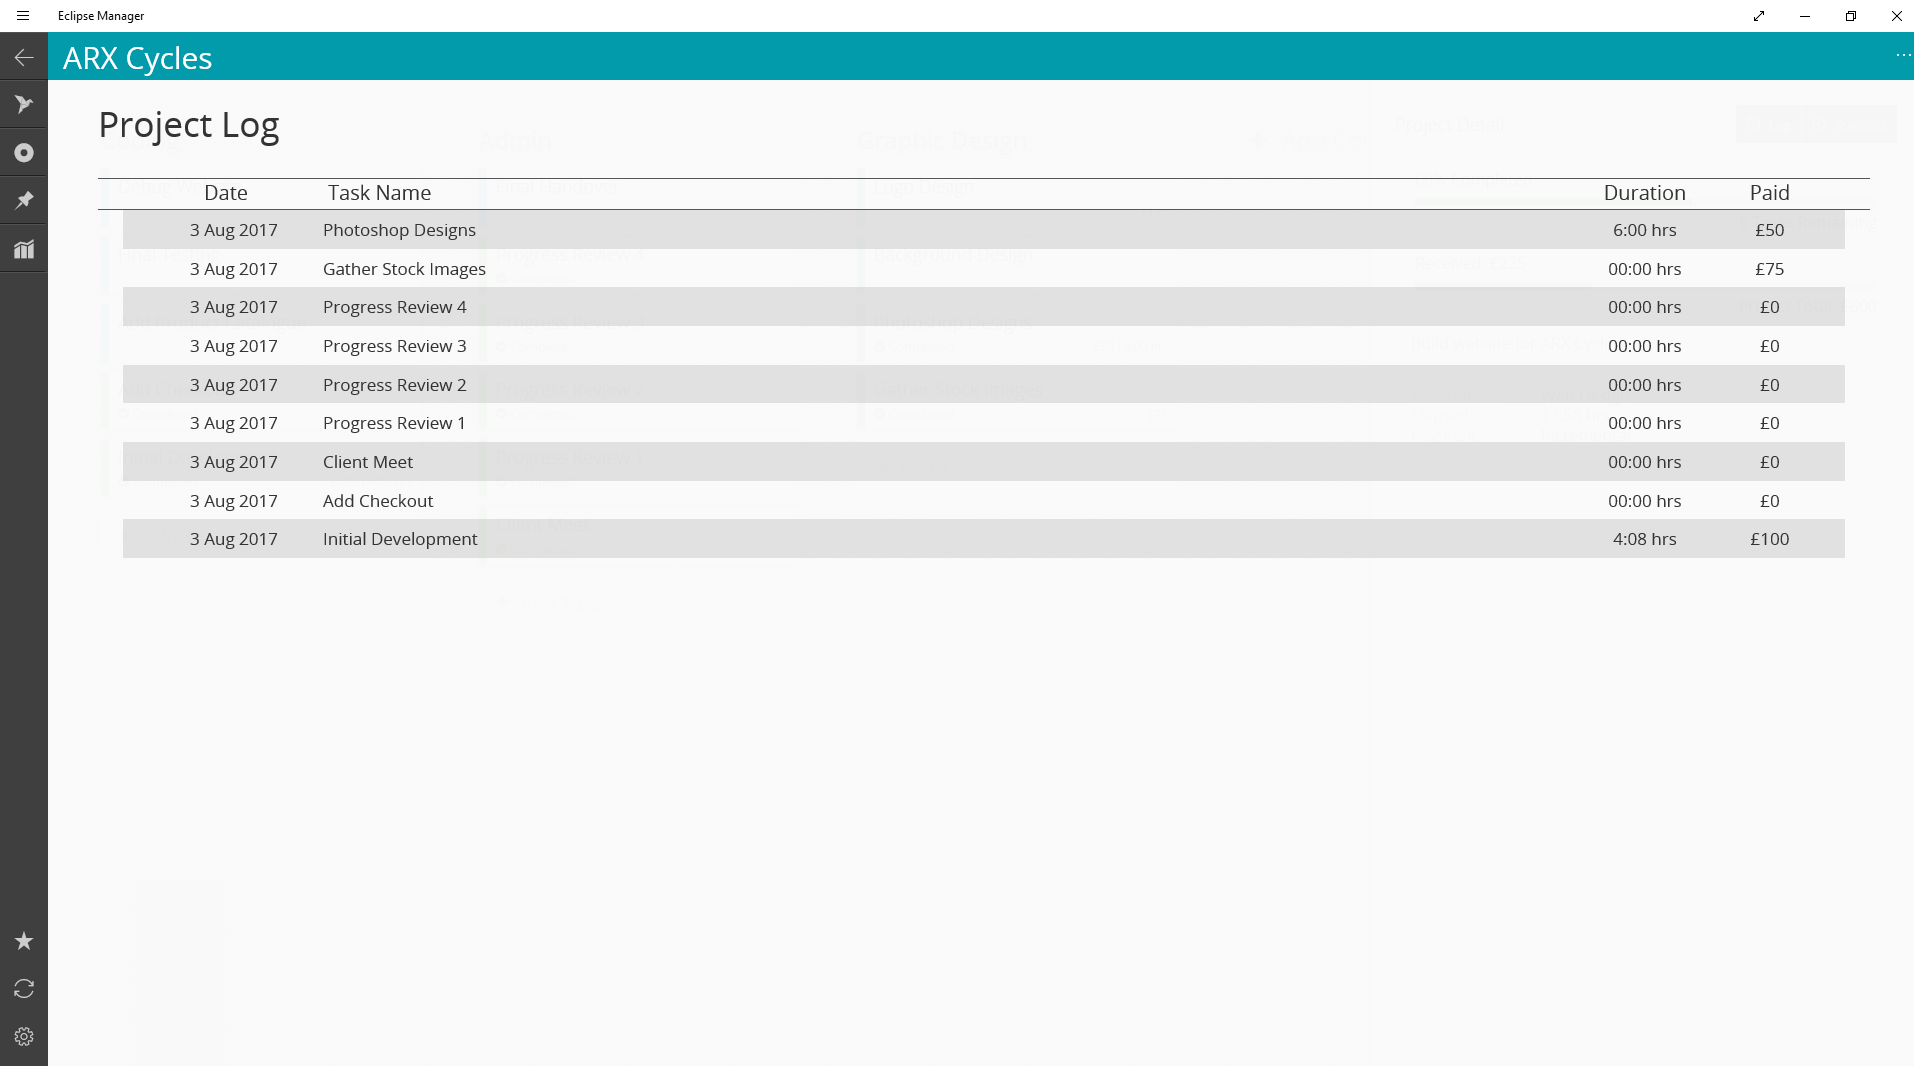
The Log page shows a list of recently completed tasks and the respective completion date. The log will also show their total duration and invoicing if they have any.